VTP Software Tutorials
Tutorial 4: Using Paging Tilesets
This tutorial will walk you through one of the most powerful features of
the VTP software: Tiled dataset (Tilesets) which can be used to visualize
datasets that are far larger than your system's RAM.
We'll be using free data from the
USGS EarthExplorer and
National Map, of a scenic spot called "Diamond Head" on the island of
Oahu.
To save you from digging around the USGS sites, I have already downloaded and
cropped some files to use:
While this isn't a massive dataset, it is
nonetheless large enough to demonstrate the process of using paging tilesets.
Step 1: Load and Examine the Data
Fortunately, the elevation and imagery are already in the same projection
(coordinate system).
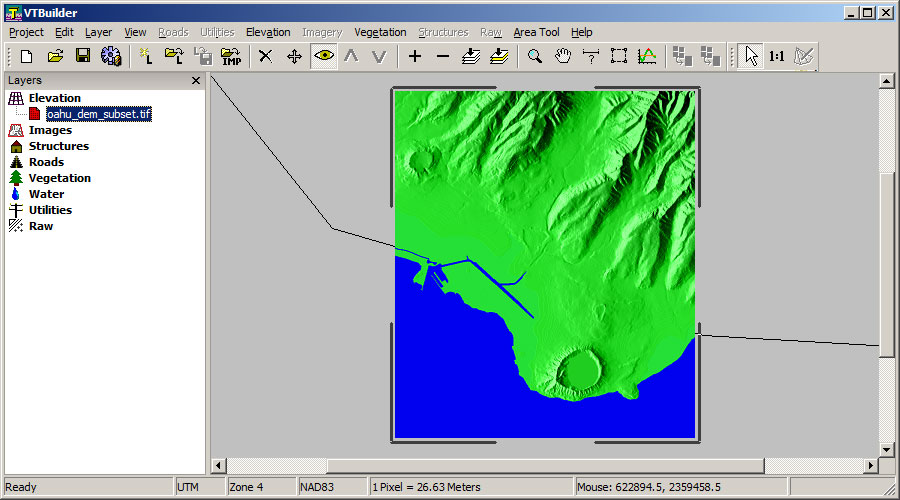
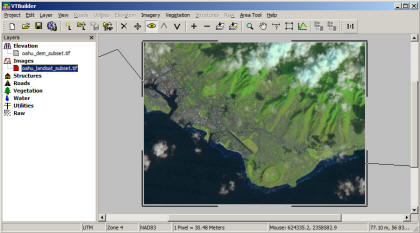
Launch VTBuilder, then drag and drop each file in: first the elevation,
which should look like this:
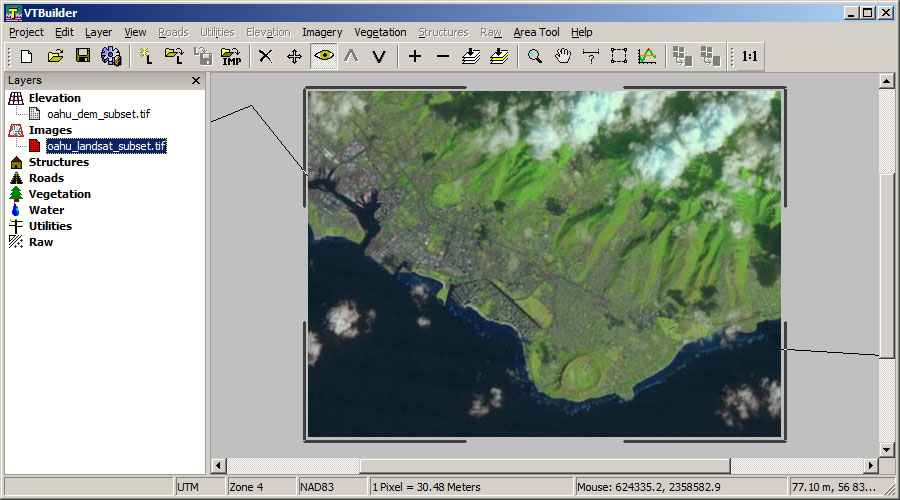
Next, the satellite image:
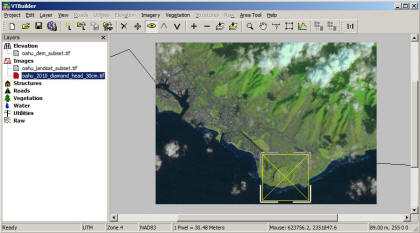
Then the high-res aerial. Note that because the image is large, by
default, we don't display it; it stays on disk until we need to sample it.
This is called "out-of-core" access. This is what allows you to sample
from huge imagery, much more than your computer can hold at once. It
also makes dealing with big data faster, since only the extents are drawn:
You can choose when images are handled out-of-core, in the
Preference dialog (menu Project: Preferences).
Step 2: Choose Area and Tiling
Let's pick an area which will encompass the Diamond Head crater and some
surrounding terrain. You can pick any area with the Area Tool, or open
the dialog (menu Area Tool: Numeric Values) and paste the
following into the Origin and Size: (618989.2, 2349855.8), (
7987.2, 9216.0)
Now let's think about what a good tiling would be for this data.
Menu: Area Tool: Match Area and Tiling to Layer:
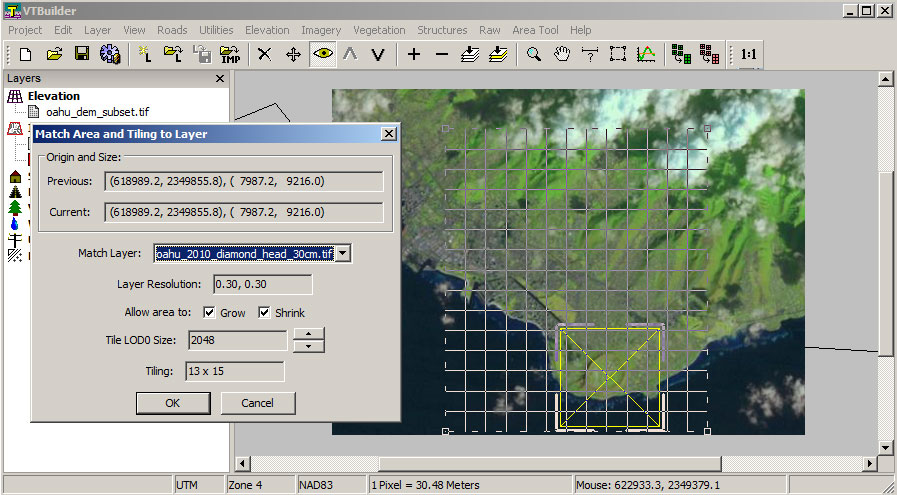
As shown, choose the 30cm aerial as the layer we want to match. That's
our highest-resolution data, we want to make sure we match it exactly,
pixel-for-pixel. To keep the number of tiles under control, we can go
up to 2k tiles (Tile LOD0 Size: 2048). That should result in 13 x 15
tiles.
If you are using the 60cm aerial instead, you can go with 1k tiles.
It will be the same number of tiles either way, but each tile will have
fewer pixels.
When you ready, press OK. VTBuilder will very conveniently shifts the
extents so that when we extract tiles, they will match our data precisely.
Step 2: Sample the Elevation
While our elevation isn't (in this example) big enough to need a tileset,
we do need it as a set of tiles so that we can use it with the tiled imagery.
So, use the menu Area Tool: Sample Elevation to Tileset.
- Choose a filename for the output, in the Elevation
folder on your VTP data path.
- Our elevation is much lower resolution than our imagery, so we can
use just Size 256, 1 LOD:
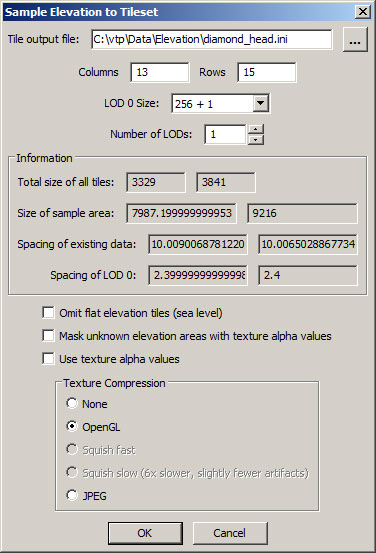
You can see that this is still oversampling our 10m DEM at 2.4m (a 4x
oversampling), but that's fine. Press OK. Say "no" to
deriving image tiles (that would be very useful if we had no real imagery,
but in this case we do). VTBuilder will do the sampling and say
"Successfully wrote" to your tileset.
Step 2: Sample the Imagery
Use the menu Area Tool: Sample Imagery to Tileset.
- Choose a filename for the output, in the GeoSpecific
folder on your VTP data path.
- Now we go up to the full 2k per tile (or 1k with the lower-res
aerial). Note how the spacing of our most-detailed LOD matches the
existing data (both 30 cm, or both 60 cm).
- Use 4 LODs, as that will allow lower-res areas of our terrain to be
smaller on disk:
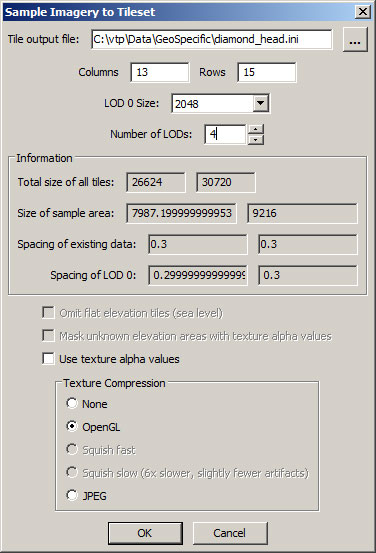
Press OK. VTBuilder will start working; it will take around 3
minutes depending on your machine. A cool feature is that because we
are using OpenGL to compress our images for us, you can see it working:
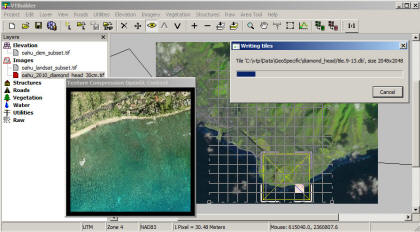
When finished, it will say "Successfully wrote".
Step 3: Describe your Terrain
Launch Enviro. Create a new terrain and set the following in
the Terrain Creation Parameters:
- Elevation: Grid Tiles: Tileset .ini file:
diamond_head.ini
- Elevation: Grid Tiles: Check the option: Use multithreading for
asynchronous tile loading.
- Texture: Tileset .ini file:
diamond_head.ini
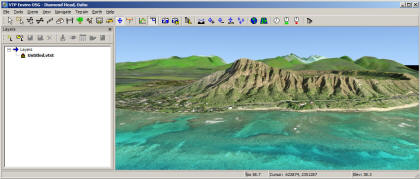
Step 4: Run
Press OK on the Startup dialog. Enviro will open its
main window with a 3D view of your terrain. You should be able to fly
around, with the terrain detail loading on the fly as needed.